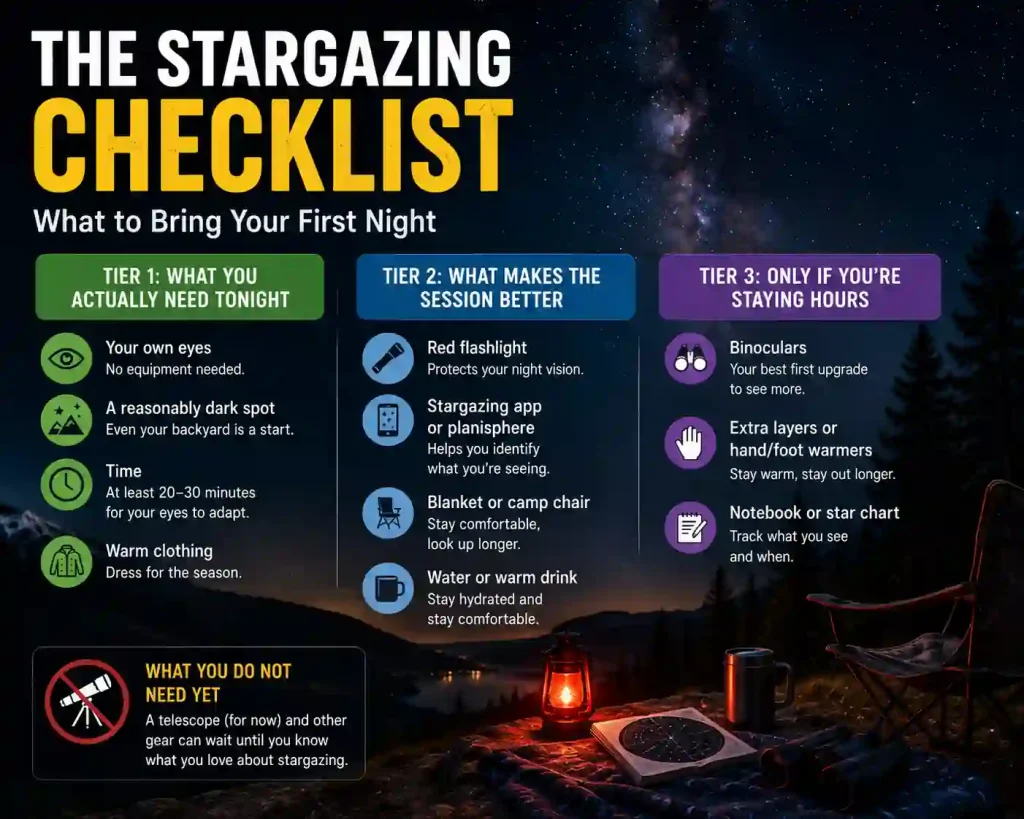
The honest version of a stargazing checklist has three tiers, not one long list: what you actually need tonight (almost nothing), what makes the session noticeably better (a handful of cheap items), and what to skip entirely until you know you're hooked (gear, mainly a telescope). Most checklists online are gear-shop pages dressed up as advice, where every item conveniently links to something for sale. This one is organized by necessity, not by what's available to buy.
Tier 1: What You Actually Need Tonight
This tier costs nothing beyond what you already own.
- Your own eyes. No equipment required to see thousands of stars, the Moon, bright planets, and the Milky Way under the right conditions. Our beginner's guide to starting stargazing covers exactly what's visible with zero gear.
- A reasonably dark spot. It doesn't need to be a wilderness site: your backyard with the porch light off is a real start. If you want to check how dark your options actually are, see our guide to finding a dark sky site near you.
- Time. At least 20 to 30 minutes, uninterrupted, for your eyes to adapt to the dark before you judge what you can see. Cutting this short is the single most common reason beginners think the sky "isn't showing anything."
- Warm clothing appropriate to the season. You'll be standing still, which gets cold faster than moving does. In cold months, see our full guide to what to wear stargazing in winter before you head out.
Tier 2: What Makes the Session Better
None of these are required, but each one solves a specific, common problem.
- A red flashlight (or a red-light phone mode). Regular white light resets the dark adaptation you just spent 20-30 minutes building: a single glance at a bright screen undoes much of the progress. Our full explanation of why is in dark adaptation and red light.
- A stargazing app or a planisphere. Either one identifies what you're looking at instead of leaving you guessing. Apps are more convenient; a planisphere never needs a battery or a screen to squint at. See our roundup of the best free stargazing apps for what each one actually does.
- A blanket or a camp chair. Necks get tired looking up, and standing on cold ground pulls heat out of you the whole time. A reclined position lets you stay out longer, which is the whole point.
- Water or a warm drink. Basic comfort for a session that might run longer than you expect once you're actually seeing things.
Tier 3: Only If You're Staying Hours
These matter more the longer and more ambitious your session gets.
- Binoculars. Not a telescope: binoculars are the better first upgrade, showing the Moon's craters, Jupiter's largest moons as tiny points of light, and a noticeably richer Milky Way, without the setup or cost of a telescope. Our guide to the best binoculars for stargazing covers what to look for.
- Extra layers or hand/foot warmers. The colder you get, the shorter your session, regardless of how good the sky looks.
- A notebook or a star chart for tracking what you've seen. Purely optional, but useful once you start returning to the same spot repeatedly and want to remember what you found and when.
A Note on What You Do NOT Need Yet
A telescope is not on this checklist, on purpose. It's the single most common first purchase that backfires: a cheap department-store telescope is often harder to use and less satisfying than no telescope at all. Our pillar guide covers when it actually makes sense to buy binoculars or a telescope, and the short version is: not on night one.
The same logic applies to a long list of accessories aimed at more advanced observers: star trackers, camera mounts, filters, and dedicated astrophotography gear. None of it improves a first session, and buying it before you know what you actually enjoy about stargazing is how gear ends up unused in a closet. Follow the tiers above in order, and let your own repeated nights outside tell you what's genuinely worth adding next, rather than a store's suggested-accessories list.
Quick List Recap
Tonight, free: your eyes, a dark-enough spot, 20-30 minutes, warm clothing.
Cheap upgrades: red flashlight, stargazing app or planisphere, blanket or chair, water.
Once you're hooked: binoculars, extra cold-weather layers, a way to track what you've seen.
Frequently Asked Questions
Do I need a telescope for my first night?
No. A telescope is not part of a beginner's first-night checklist at all: start with your eyes, add binoculars later if you're enjoying it, and only consider a telescope once you know specifically what you want to see in more detail.
What's the one thing beginners forget?
Time. Most first-timers step outside, look up for two minutes, see very little, and go back in, right before their eyes would have finished adapting to the dark. Budgeting the full 20-30 minutes is the single biggest free upgrade to what you'll actually see.
Is a red flashlight really necessary?
It's not required, but it solves a real problem: a bright white light resets the night vision you just spent half an hour building. A cheap red flashlight, or red cellophane over a white one, avoids that reset entirely.
Can I put this checklist together for under a few dollars?
Yes, the only genuinely free-and-required items are your eyes, a dark-enough spot, time, and clothing you likely already own. Everything in Tier 2 and Tier 3 is optional and can be added gradually as you find you enjoy the hobby.
Should I build a checklist for every trip, or just my first one?
Even experienced stargazers tend to keep some version of this list in mind, especially the Tier 1 basics of timing and darkness, since those two factors matter on every single outing, not just the first. What changes over time isn't whether you check the list: it's how automatic the habit becomes.